
Happy Friday, yall!
I’ve been working on my blog design for
the past week or so, and I came across a total game-changer yesterday! This is
too good not to share.

I’ve seen so many tutorials on how to
make fabulous blog headers using pictures or backgrounds, but I really wanted
something simple and white—and seamless! I can’t tell you how many white
rectangles I downloaded for my header and I could always see the
border against the white background of my blog. They never looked crisp and
clean.
I saw this tutorial on A Typical English Home yesterday which introduced me to PicMonkey. I love the tutorial and website,
but I don't want pictures in my header, so I started doing some hunting around
the site. I found this blog post from their site on tips and tricks, and one was transparent backgrounds—bingo!
This tutorial is really easy and makes for a sleek looking blog header.
Start by clicking “Create a collage” on
the homepage.

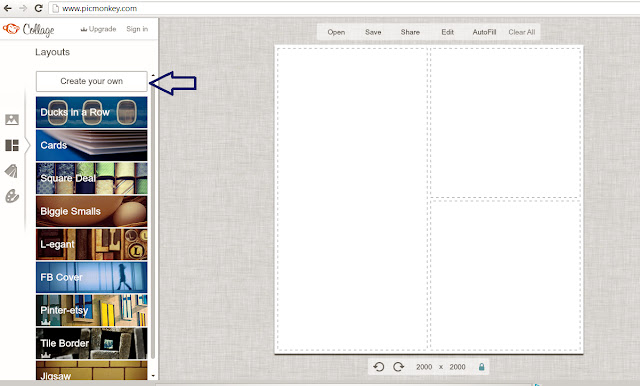
Select “Create your own” at the top. It will have one square that fills the entire area.
Go to the background tab by clicking the paint tray on the
bottom left.

Check the box next to “Transparent background." The image box
should turn gray to match the background of the website.

You can save this for later use, so you don’t have to repeat
these steps if you want to make another header, buttons, page tabs, etc.

After you save it, it will take you back to the main screen
so you can continue working. Press the edit icon.

You can start by adding whatever you like. I started with
text, the P icon on the left.

Add your text. Change the fonts on the left and
the colors and sizing on the right.

If you want to add another text box, just click “Add Text” again at the top left. If you want your text to have the same exact color, write down
the number in the top right and type it in that area in your next text box.

There are tons of extras that you can find in all the tabs
on the left. I wanted a seal around my monogram, so I went to the word bubble
tab right below text and found what I wanted in the “Nautical” section.

I changed the color to match my blog design. The inside of
many of the shapes is white, which shouldn't be a problem if your blog background is
white. Right click the object and send it to the back, so your wording shows up
on top.

Arrange everything how you want it.

At this point your image is a square. Most blog headers are a
rectangle, so you can go back to the top atom looking icon and crop your image
to a rectangle.

You can also rezise in this tab by clicking the resize
button at the bottom. I resized mine to 900 pixles, but it will depend on the
width of your blog. You can edit your widths in the blogger template. Make
sure the box next to “Keep Proportions” is checked (it should be automatically
checked).

Save your new image by clicking the save button at the top.

Upload your new header to your blog, and you’re done!
You’ll notice that the colors changed a little bit. That’s
because in the editor everything has a shadow, but when you save you image, the
shadow disappears and your image will be flat and crisp!
Linked to:
The 36th Avenue
Linked to:
The 36th Avenue


